

📰Getting Started | ⭐**Updates |** 📝 Guides | 🔢 API | ❓FAQ
Web Editor Basics
HoloLens
Mobile
Meta Quest
Chapter Series Documentation
Assets
Scripting
Enklu Embedded
API Reference
Release Notes
FAQ
Contact
Assets that have animations can be used with Enklu. The platform supports animations that play on their own or are driven through scripting. This guide will teach you how to configure an Animator Controller in Unity to be used in your experiences. It's recommended to have a basic familiarity with Unity, and to have already read the Import Your Own Assets guide. If you'd like to follow along with this guide, you can get the assets used here.
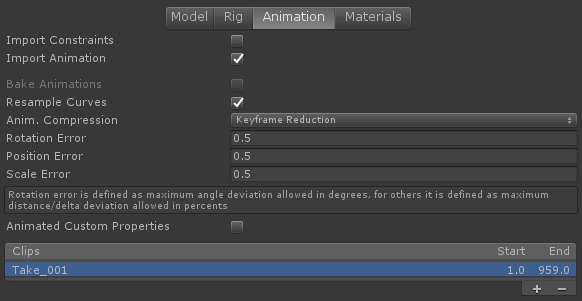
When importing content into Unity, it's pretty common for animations to be baked directly into the model's file. To view the animations in a model, select it in the Project View and look for the Animation tab in the Inspector. Depending on the file, it may have explicit animations or one combined animation, typically called "Take_001".
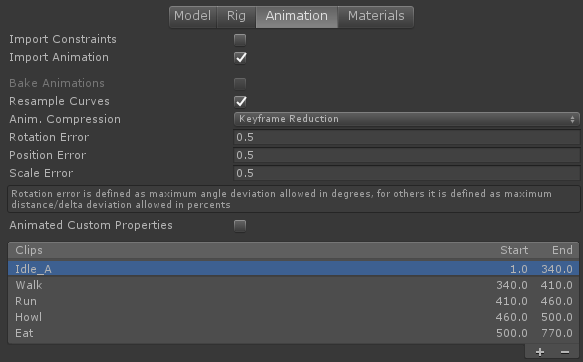
Sometimes content has animations in separate files than the model. In the wolf example provided, its animations are in separate .fbx files from the base rig. If your animations are in other files, you can skip this step.
<aside> 🗒️ Note: If your model only has one animation, click the + button to add more clips. Each clip can be modified to have its own Start and End frame. Later when configuring an Animator Controller, each of these individual clips will be visible.
</aside>
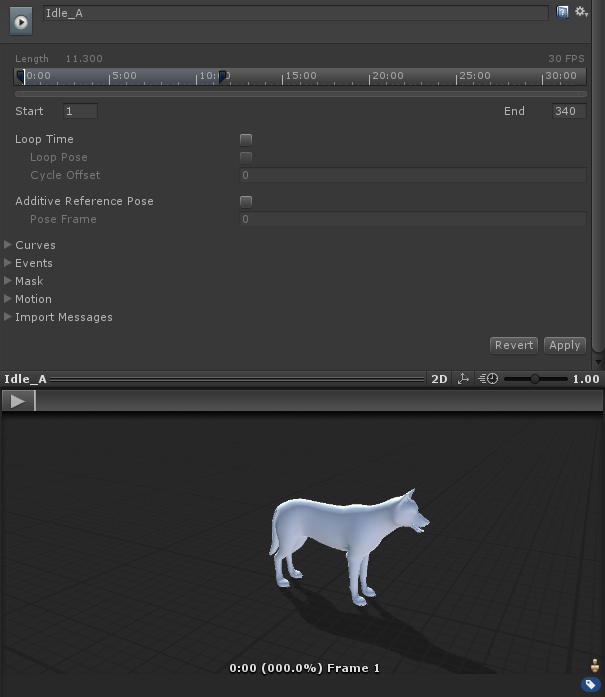
Once you have your animations split how you'd like, make sure you apply your import settings. Clicking off the inspector will prompt a dialog reminding you.
Drag your model into the scene, and select its GameObject to view it in the Inspector. If your content came as a Unity prefab a lot of these steps may have already been done.
Add an Animator component to the GameObject, and attach the Avatar that came with your model.

Create an Animator Controller in your Project View, and add it to your GameObject's Animator.
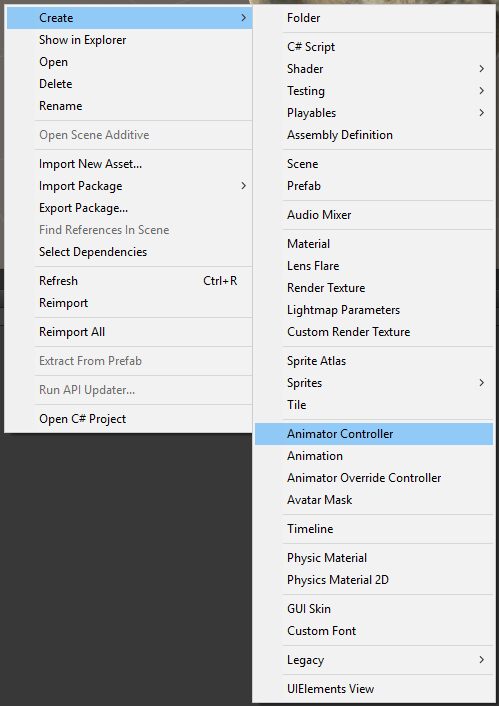
Double click the Animator Controller to open Unity's Animator View. If your content came with an Animator Controller already, it might already have a lot of connections already. Feel free to work off what's there, or delete everything and start from scratch.
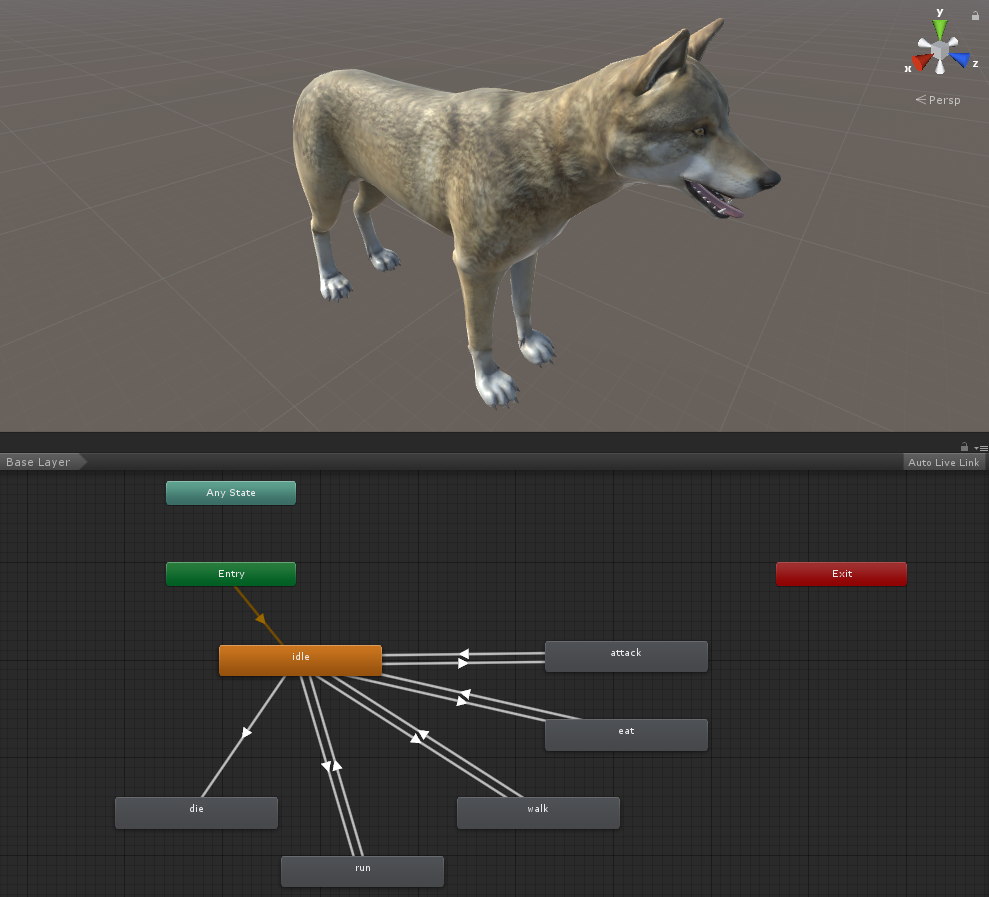
It's important to make sure that the Animator is on the root GameObject that you'll be exporting for Enklu.
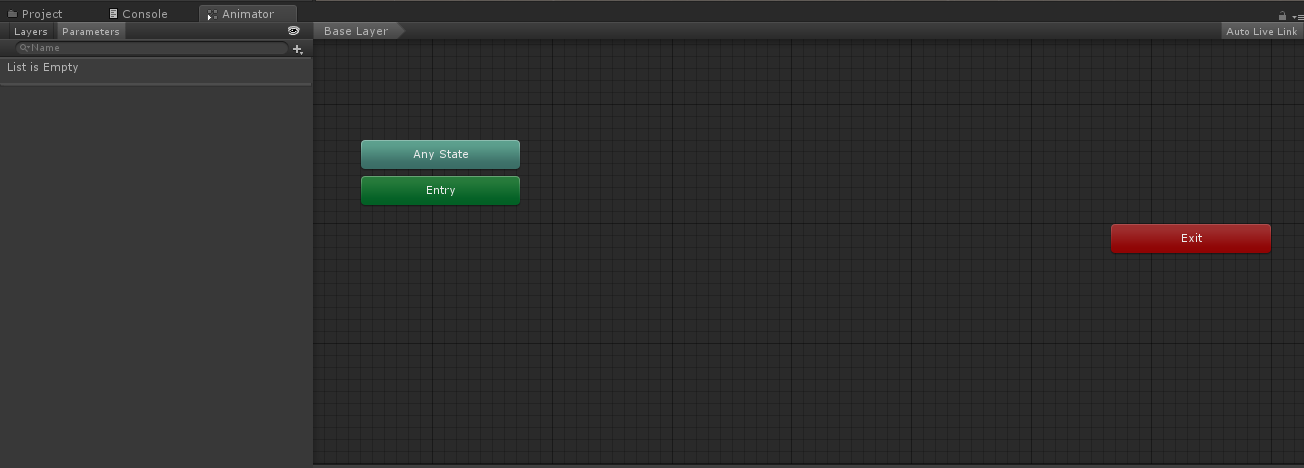
The Animator View has two sections. The layers/parameters list, and the layer editor. For now, we'll focus on only one layer. Right-clicking in Unity's Animator View allows you to create States and Sub-State Machines. Both are useful, but have important differences. A State is a single motion or animation, while a Sub-State Machine allows for a series of motions or animations to be treated as one. To keep things organized, it might be easier to always use Sub-State Machines even if it will only contain one State.
Start by creating separate Sub-State Machines for all of the intended visuals. In this guide we'll start off by creating three simple visuals: Idle, Eat, and Run. A generic "Control" state will be placed first to allow for additional logic later if needed.

To control when these different flows are started, we'll add parameters. Parameters can be of type Float, Int, Bool, or Trigger. Triggers are like Bools, but will automatically switch off after being used. In this setup, we'll use a Bool for Run so that the wolf will always be running until explicitly told to stop. A Trigger will be used for Eat, so it can be set once and not have to be worried about after. Parameter names can be called anything, but it's helpful to name them after the animations that you'll use them to drive.

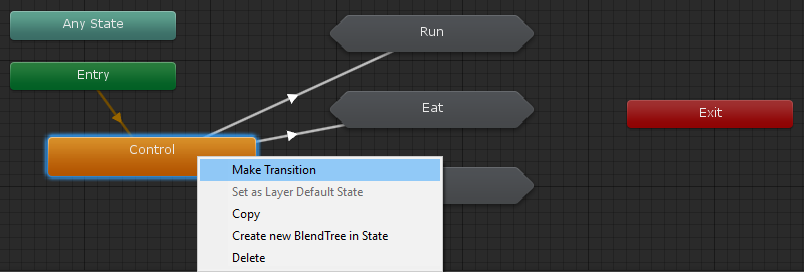
Next, Transitions need to be set up from the Control state to each of our flows. Transitions are made by right-clicking a state, selecting Make Transition, then clicking the destination for the transition.
Clicking an individual Transition line lets you see the properties associated with that Transition. For each flow, you'll have to add entries to the Conditions section to link the parameters to a Transition.
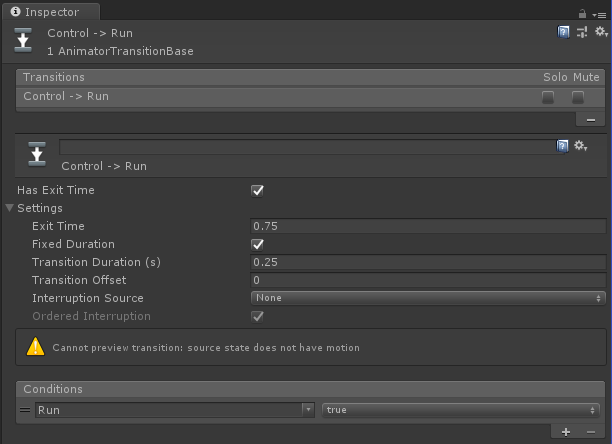
Transitions are evaluated in the order they are created. The order can be modified by selecting the source node and dragging its Transitions in the Inspector.

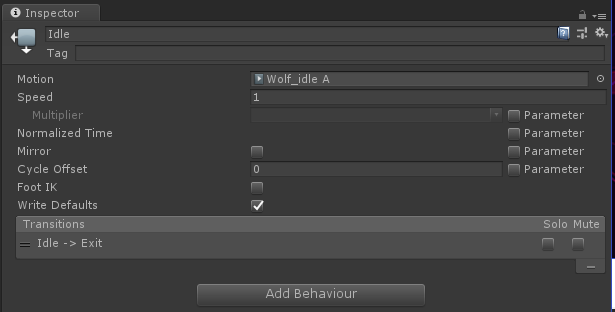
Double clicking a Sub-State Machine will enter it, and allow individual states to be added. Once a state has been created, you'll have to assign a Motion from the Inspector. The motions will have the same names as the imported animations from the first part of thie guide. It's important to setup a Transition to the Exit node, so that the flow will leave the Sub-State Machine. Depending on your desired effect, you may want to have multiple Transitions to exit. This can be useful for allowing immediate changes to other flows, or for forcing a flow to finish before it exits, regardless of what happens with the parameters.

More complex flows can be created inside of a Sub-State Machine. For instance, if the wolf is always supposed to howl before sprinting, all of that can be controlled in the Run flow. In this setup, there's a Howl state and a Run state. The Run state has a two Transitions on it. One leads to Exit if the Run parameter switches to false. The other transitions back to itself, so the wolf will continuously run until stopped.
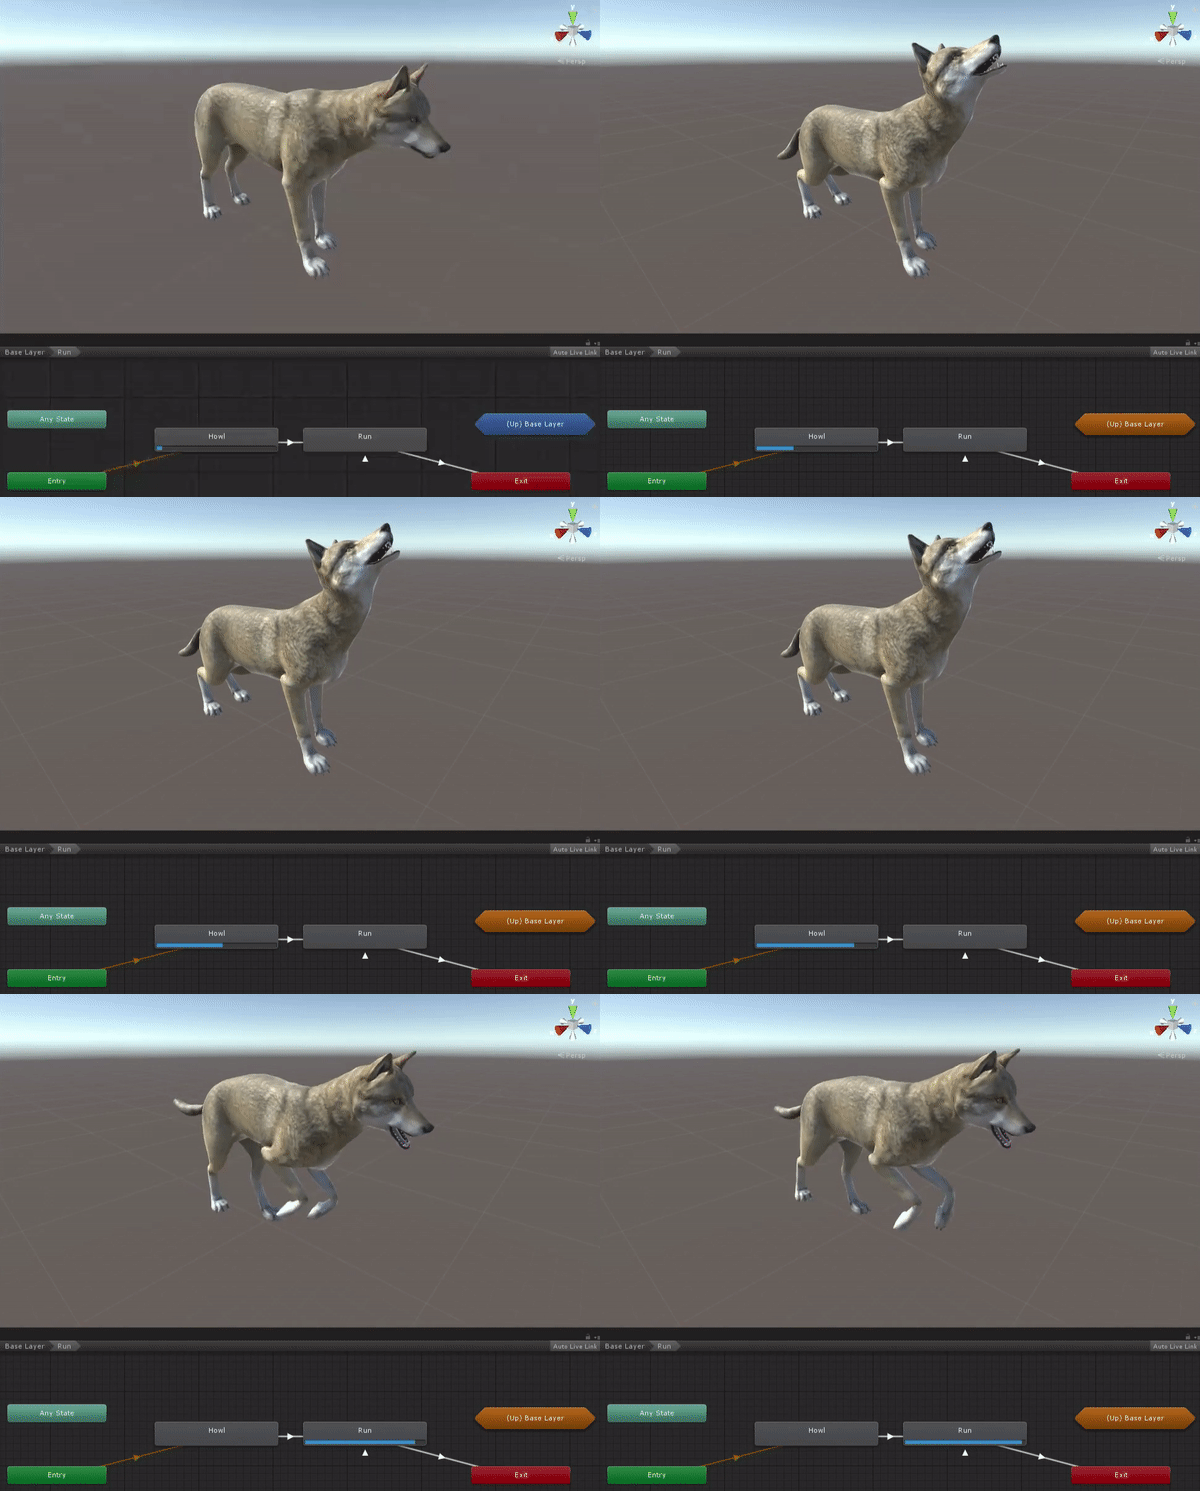
Remember to preview your configured Animator Controller in Unity! Selecting the GameObject and entering Play mode will allow you to modify parameters dynamically.
When finished setting up your animations, make sure to click the Save Project button in Unity so all of the settings get saved to the Animator Controller file. After everything is ready for export, be sure to include the Animator Controller's .controller file and any external .anim files if they weren't imported directly from your model. Adding your content to an Enklu experience, any default animations will start to play. Parameters can be controlled at runtime through scripting (see Controlling Animations for more information).
To export your asset from Unity to the web editor, check out our guide here.
Next: Scene Complexity Recommendations
Sidebar Table of Contents
