
📰Getting Started | ⭐**Updates |** 📝 Guides | 🔢 API | ❓FAQ
Web Editor Basics
HoloLens
Mobile
Meta Quest
Chapter Series Documentation
Assets
Scripting
Enklu Embedded
API Reference
Release Notes
FAQ
Contact

Use a microfiber cloth to clean the device. Do not use alcohol-based wipes or solvents on the display or sensors. The brow pad and headband may be cleaned using a microfiber cloth with mild soap and water. Never submerge the device in water or apply water directly to the device.
When taking the device off, fully loosen the adjustment wheel. Attempting to remove the device without loosening may damage the internal ratchet mechanism and break the inner band.
If you need to set up your HoloLens 2 for the first time, please refer to Microsoft's Set up your HoloLens 2 guide.
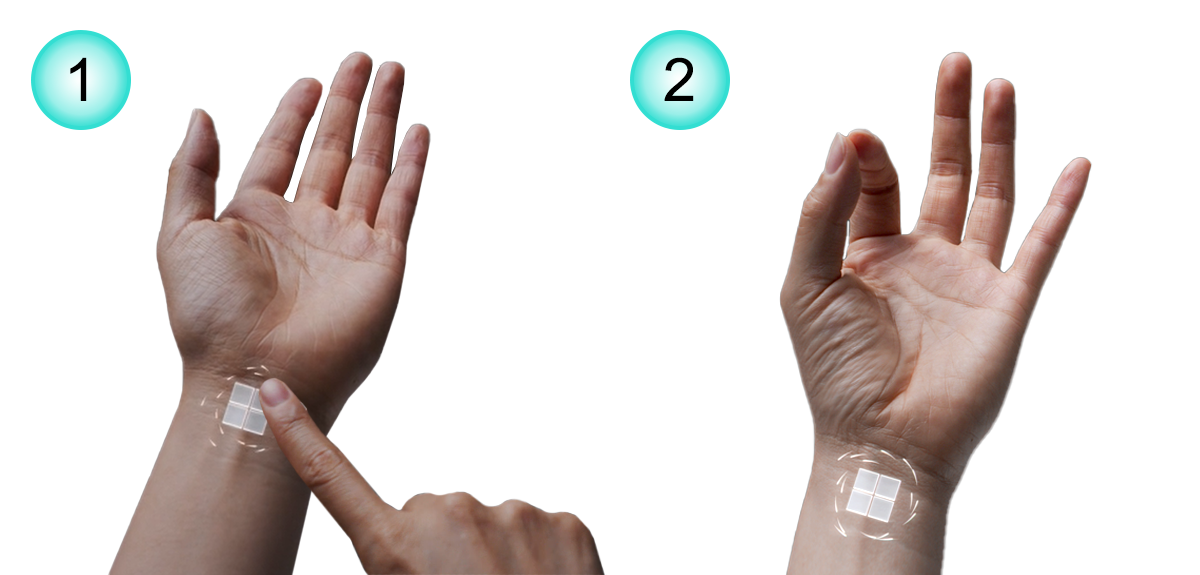
There are 2 ways to open the Windows Start menu: a two-handed Start gesture and a one-handed Start gesture.
*Note: The device must be calibrated to the user's eyes for the one-handed Start gesture to function correctly. If looking at the Start icon does not cause dots to spin around the icon, this is an indication that the device should be re-calibrated. To calibrate the device, go to Settings > System > Calibration, then select Run eye calibration.
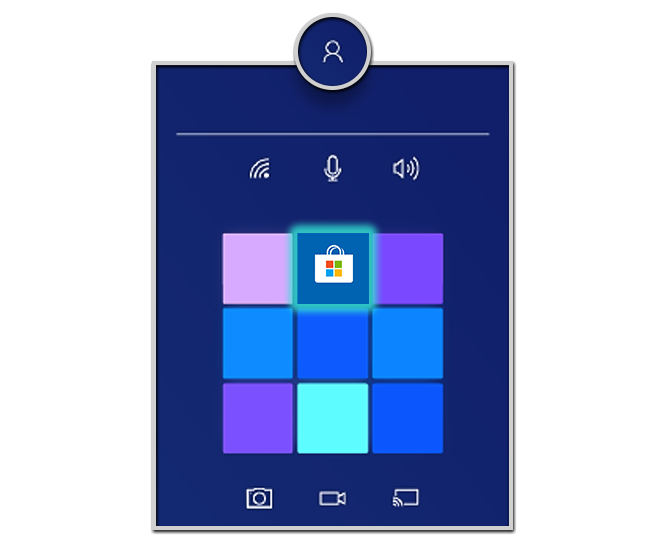
From the Start menu, locate and open the Microsoft Store app. Within the Microsoft Store app, use the search bar at the top to search "Enklu".
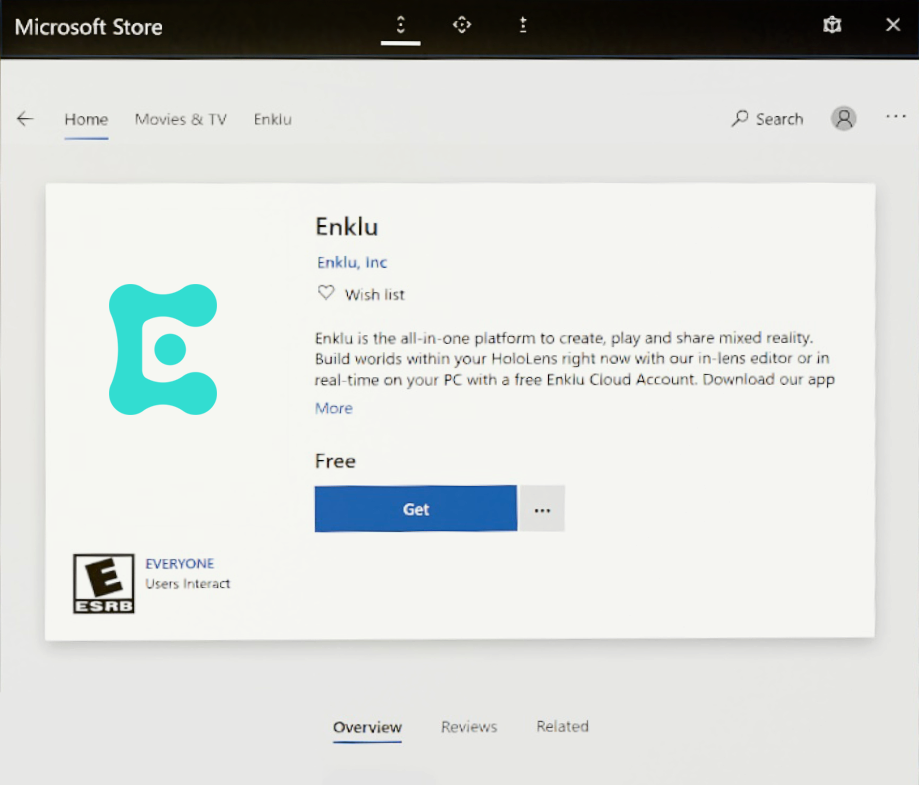
Navigate to the Enklu app page and select Get. You may be prompted to sign in with your Microsoft account, then the Enklu app will begin installing. Once the Enklu app has finished installing, you may launch the app from either the Microsoft Store, or from the Windows Start menu.
A white application window will open momentarily before the display switches to fullscreen mode. An Enklu "E" logo appears when the application is starting. If an existing instance of the Enklu app is already running, the app will load into where the user left off when the app was last in use.
When launching the app for the first time*, the default demo experience will be loaded. Feel free to walk around the environment learning about what different elements of an experience can be built. All buttons in Enklu can be activated with your gaze by moving the center of the device to match with the center of the button. If the scene content isn't positioned nicely in front of you or is otherwise inaccessible, say the phrase "Debug, Origin" (with a slight pause between the words) to re-position the experience at the center of your view.
*During the app's first launch or after updates, you may be prompted to accept permissions. Granting permission to use the device's microphone allows the app to process voice commands. Granting permission to use the device's camera allows the app to scan QR codes for login. These permissions can be updated at any time by going to Settings > Privacy > Speech and Settings > Privacy > Camera.
After exploring the default scene, activate the Login* button with your gaze to start the QR code scanner.

*The Login button will change its location in an attempt to follow the user as they explore the scene. If you cannot find it, turn 90 degrees either left or right, then don't move for about one or two seconds. This will prompt the Login button to find the user and position itself in the center of the user's field of view.
In a web browser, navigate to cloud.enklu.com. Log in to your Enklu account or create a new account if you do not already have one. New accounts are given their own copy of a few Chapters demo experiences.
On the top left of the web editor next to the experience name, click the Experience tab and select HoloLens Login.
This will generate a QR code that the HoloLens can scan* to log the device into your account and load into the currently loaded experience in the web editor.
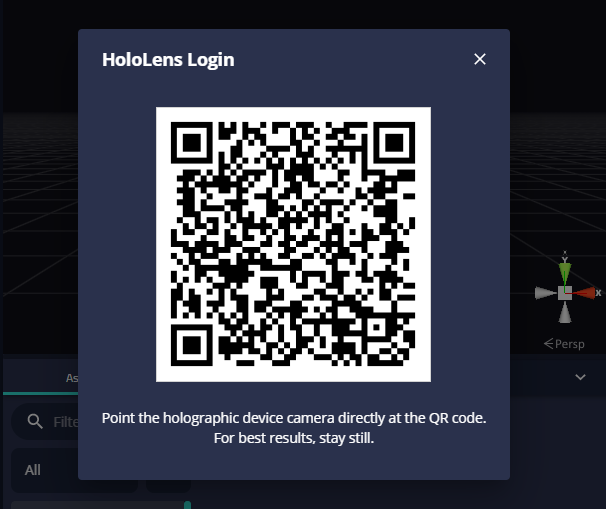
*If the device is unable to scan the QR code, first check that the device is connected to WiFi and has an internet connection. Next, the exterior of the device will illuminate a white LED when the camera is scanning for QR codes. If there is no illuminated LED, the camera permission could be denied. Check the camera's permission settings in Settings > Privacy > Camera. Restart the app and try scanning again.
Within an experience, using the voice command "Menu" will display the experience menu. This menu lets you exit the current experience, as well as enter Edit Mode on device.
Activating the red back arrow will leave the current experience and let you browse the other experiences available to the logged in user.

Activating the red back arrow once more will log the current user out and prompt a QR scan to log in a new user.

Next: HoloLens 1 101 & Set-Up
Sidebar Table of Contents